A couple of weeks ago I was playing with Tuya derived smart light globes (Mirabella Genio from K-Mart Australia in my case, but there are a variety of other options as well). Now Bunnings has the Brillant Smart Wifi Plug on special for $20 and I decided to give that a go as well, given it is also Tuya derived.
The basic procedure for OTA flashing was the same as flashing the globes, except that you hold down the button on the device for five seconds to put it into flash mode. That all worked brilliantly, until I appear to have fat fingered my wifi details in Tasmota — when I rebooted the device it never appeared on my network.
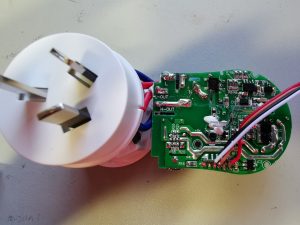
That would be much more annoying on the globes, but it turns out these smart plugs are really easy to open and that Tuya has documented the pin out of the controlling microprocessor. So, I ended up temporarily soldering some cables to the microprocessor to debug what had gone wrong. It should be noted that as a soldering person I make a great software engineer:

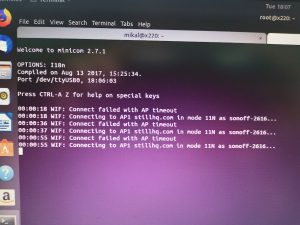
Once you’ve connected with a serial console, its pretty obvious who can’t be trusted to type their wifi password correctly:

At this point I was in the process of working out how to use esptool to re-flash the plug when I got super lucky. However, first… Where the hell is GPIO0 (the way you turn on flashing mode)? Its not broken out on the pins for the MCU, but as a kind redditor pointed out, it is exposed on a pad on the back of the board:

…and then I got lucky. You see, to put the MCU into flashing mode you short GPIO0 to ground. I was having trouble getting that to work with esptool, so I had a serial console attached to see what was happening. There I was, shorting GPIO0 out over and over trying to get the magic to work. However, Tasmota also setups up a button on GPIO0 by default, because the sonoffs have a hardware button on that pin. If you hit that button with four short presses, you put the device back into captive portal configuration mode…
Once I was back in that mode I could just use a laptop over wifi to re-enter the wifi password and I’m good to go. In hindsight I didn’t need the serial port if I could have powered the device and shorted that pin four times, but it sure was nice to be told what was happening on the serial console while poking around.
The HA config for my switch is now online at https://github.com/mikalstill/homeassistant-configs/commit/843ca9d3d869d764416af67522f539814bccef0c